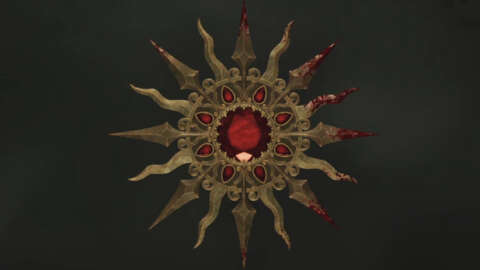
Scattered across each one of Crisol Theater of Idols‘ levels are a lot of collectables. Some enable you to purchase skill upgrades in the shop, such as the Crisol Theater of Idols Crow Relics, while money allows you to buy upgrades for your weapons, and Blood Vials to increase your maximum health pool.
Once you find a Solari agent’s corpse, you’ll need to absorb it to get the Solari Broach. You can use these to unlock the Solari chests found in the Fair hub area. Open each available chest before moving on to the next level, as toward the endgame, the paths to the lower-numbered chests will be blocked.
As a top tip, make sure that you save the game often and use multiple save slots. A lot of the chests in Crisol: Theater of Idols are missable, and nothing is more frustrating than having one sneak away from you because you ventured past a point of no return.
#1 – Tormentosa Fair (Floor -1)

- Chest Contents: 350 Silver Bulls
After emerging from the basement ladder, go past the stairs to the left and down the stairs next to a woman leaning on an abandoned truck. Turn right, and you’ll find a deceased Solari agent slumped over a chest. This is their chest, and you can use the broach to open it.
#2 – Mermaid District (Floor 0)

- Chest Contents: 1x Crow Relic and 250 Silver Bulls
While making your way through the market square that leads to the Tablao Zafiro, you’ll come across a memory of a Solari agent telling his parents to get to safety. Continue on the path forward to find his corpse near a wrecked cart leaning on the fishmonger’s window. We recommend you pick this up before unlocking the gate and attracting the attention of Dolores.
#3 – Mermaid District (Tablao Zafiro Floor 1)

- Chest Contents: 1x Crow Relic and 250 Silver Bulls
You can’t miss this one, as interacting with it is required to progress the story. As you go through the dark staircase, you’ll eventually find the cogs that operate the mechanism for opening the doors. Leaning on the ladder underneath the cogs labeled “Escenario” is the corpse. You have to absorb it to unlock the path to the next part of the level, as it’s holding onto the mechanism.
#4 – Mermaid District (Floor 0)

- Chest Contents: 1x Crow Relic and 250 Silver Bulls
Grabbing this Solari Broach requires that you have the bolt cutters you needed to enter Tablao Zafiro. From La Plañidera’s shop, head west, then north to the Freight Lift. Turn left to find a door and head downstairs. In the next room over, you’ll find a door locked with chains. Break them with the bolt cutters, and you’ll find the Solari Broach on an agent’s beheaded corpse.
#5 – Mermaid District (El Cuerno Albino Floor 0)

- Chest Contents: 1x Crow Relic and 250 Silver Bulls
This Solari Broach also requires that you already have the bolt cutters. From the entrance to El Cuerno Albino, head downstairs and through the bar to the other side. Pass through the door at the back, and instead of turning right to continue onward, go left instead and use the bolt cutters on the door. Go upstairs and kill the enemies emerging from the stalls in the massive bathroom. Go around the corner and inspect the last stall to find the corpse.
#6 – Mermaid District (Floor 0)

- Chest Contents: 1,000 Silver Bulls
After grabbing the T-Handle Wrench, you can now activate the Freight Lifts. Use it to unlock the shortcut back to the courtyard that leads to Tablao Zafiro. Head for the southwestern corner where you’ll find a motorbike and a mine cart you pushed earlier to escape Dolores to find a Freight Lift. Use your newly acquired T-Handle Wrench to raise it and go into the building. You’ll find a gruesome scene of a Solari agent who died while being crucified and slaughtered on an anchor.
#7 – Ram District (The Dam Floor 2)

- Chest Contents: 1x Crow Relic and 800 Silver Bulls
In the Fierro Bravo Construcciones warehouse with electrified cables that require you switch them off, there is a room in the northwest blocked by a mine cart. Push it, and you’ll find a Solari agent’s corpse, having died because of a pickaxe to the shoulder.
#8 Ram District (El Picadero Floor 3)

- Chest Contents: 1x Crow Relic and 800 Silver Bulls
Inside the main entrance to El Picadero, after ascending the staircase to the top, you’ll see a blocked door in front of you and a set of double doors to the right. To the left is a ledge that leads inside the room to the north. Go to the northwestern corner of the room to find a Solari agent slumped on a trolley next to a light and surrounded by pigs.
#9 Ram District (The Hoist Floor 0)

- Chest Contents: 1x Crow Relic and 800 Silver Bulls
This Solari Broach requires that you pick up both the Brake Lever and the Wrench. In the main central area where all the Sector doors are, you’ll see on the map a locked area to the west along some train tracks. Use the Wrench on the gas leak, then kill the Cherubs that fly by. Use the Brake Lever to move the mine cart and enter the room. Kill the enemies inside, then collect the broach from the corpse in front of you.
#10 – Ram District (The Dam Floor -3)

- Chest Contents: 1x Crow Relic and 800 Silver Bulls
After obtaining the Brake Lever, head into Sector C. From there, you’ll find yourself wading through sewers and tight spaces. Eventually, you’ll come across a tight gap that leads into a cellar. Kill the enemies that appear in the first room to the left and head into the next corridor leading to underneath The Dam. Before climbing the ladder, head up the next set of stairs, leading to a gate. Open it and turn left to find an open door with a dead Solari agent next to a chair.
#11 – Ram District (The Dam Floor 0)

- Chest Contents: 1,500 Silver Bulls
Once you emerge from the sewers after getting Switch D, you’ll have a conversation with Mediodía, where she asks you about past lives. In the room where this radio chat begins, there is a cart with a yellow tarp on top blocking the door. Push this toward the vent and climb through. You’ll find a Solari agent in the next room, who died because he was run over by a truck through a wall.
#12 – Anchor District (Tower of Judgement Floor 4)

- Chest Contents: 1,500 Silver Bulls
This one is missable. The way to the broach will shut later on the floor thanks to a gate that closes behind you after solving the Sun puzzle on this floor. As you reach the fourth floor, you’ll see a red light passing back and forth in a room with a cell gate at the back. Crawl under the rock to the left in this room instead of doubling back. If you enter the room ahead where you see a memory of Admiral Castigo berating some prisoners, you’ve gone too far. Kill the enemies you find here and follow the path upwards to find this elusive Solari Broach.
#13 – Anchor District (Floor -1)

- Chest Contents: 1x Crow Relic and 1,200 Silver Bulls
To get to this corpse, you’ll need to have the Octopus Valve. When you return to the central area with the boats, unlock the Octopus Valve door to the south. This leads to a path where you can raise the gate inside. You now need to find the powerboat in this area, which could be toward the northern side where you left it to grab the Small Ship’s Wheel.
Drive it back to the dock where you originally found it to the south, but instead of disembarking, keep going. Head through the tunnel, and you’ll find a docking station. Keep going through the newly opened gate to discover the Solari corpse on the path ahead. The Small Ship’s Wheel can help you get back to where you started.
#14 – Anchor District (Floor 0)

- Chest Contents: 1x Crow Relic and 1,200 Silver Bulls
After grabbing the Octopus Valve, head east from the central area with the boats, back toward the Tomb of Dolores, and unlock the Octopus Valve door. Go outside via the door ahead and up along the path until you see a wheel. Activating it unlocks a previously locked gate. Head back toward the boat, wherever you left it, and return it to the dock where you originally found it.
From there, head north and take the path to the right. Follow it along until you find a dock. Continue on the path, pushing the mine cart covered in a yellow tarp to reach the upper levels. After exploring this little area, drop down the point of no return marked in yellow. Continue through the house ahead, and you’ll find a ladder leading back to the boat. Instead, hop over the gap through the window to the classroom in the nearby building. You’ll know you’re in the right location when you see a memory of children talking to their teacher. Head through the rooms, and you’ll eventually find the corpse draped over the balcony.
#15 – Anchor District (Tower of Judgement Floor -2)

- Chest Contents: 1x Crow Relic and 1,200 Silver Bulls
This is another missable one. Once you go up the elevator back to the entrance of the Tower of Judgement, you can never return here. After the third scale puzzle and the section where you fight lots of enemies up some staircases guarded by dart traps, you’ll eventually head down a corridor into a circular room. Instead of going east to escape the tower, head west into the cellar. Here, you’ll find a couple of dart traps. Dodge the beam of the one on the path ahead, then turn around at the wall to find a small gap to the right. Crouch and head through to move the first barrel.
Go back through the gap and try to judge the timing so that you can immediately turn right into the newly freed path. This leads to the second barrel you need to shift. Once you’ve done so, start heading back the way you came until you find a new gap to the right. This leads to the final corpse, but make sure the dart trap doesn’t see you before trying to pick it up.


