

Are you sure you’ll be able to defeat all bosses in Mewgenics? The game has dozens of tough foes, ranging from annoying cat ghosts to gargantuan kaiju. You’re not always guaranteed to succeed, but every failed attempt is a learning experience. That said, we do have a bunch of tips to help you prepare. Oh, and please keep in mind that this article contains major spoilers.
Note: For now, we’re going to discuss the major bosses found in the game’s first act. These include your opponents at the end of each branching path and those in secret zones. We also tackle the house bosses that invade your abode every few days. Anyway, if you’re as curious as a cat, our Mewgenics guides hub has even more articles for you to check out.
Endzone bosses, secret bosses, and house bosses, oh my!

There are numerous bosses in Mewgenics so, to alleviate confusion, we have to categorize them based on types and where they appear during an act/chapter:
- Minibosses – These are encountered midway through each zone.
- End-of-zone bosses – These are the bosses that you fight at the end of each zone. Examples include the Rat King and Queen Hippo in Act 1 – Alley.
- End-of-act bosses – These are also end-of-zone bosses, but beating them means you’ve cleared an act’s branch. Examples include Spinnerette and Dybbuk in Act 1 – Caves and Act 1 – Boneyard, respectively.
- House bosses – These bosses appear after clearing an act’s branch and they will invade your home every few days.
- They can only be fought by “retired” cats–i.e. those who’ve already completed a single run and returned home.
- There are three encounters in total. Each encounter yields a special quest item related to progression. These objects have modifiers that make successive runs tougher.
- If you fail an encounter, the boss will return after a few in-game days.
- Secret zone bosses – Upon completing an entire progression quest arc, you gain access to that act’s secret zone. There, you have to eliminate a major boss to conclude the chapter.
We’ve got all the information for you in our invention and progression quests guide so you can plan ahead of time. Likewise, end-of-act clears and secret zone clears yield rewards for characters that managed to survive. These are class-specific rewards, which means you should bring new classes to future runs if you want to unlock everything.
All these challenges might seem daunting–and yes, they are–but you could always read the tips from our articles about the best classes, best skills, and best weapons/items.
Act 1: Caves – Spinnerette

This Mewgenics boss fight starts out as a joke, since you’re up against a Baby Spider. However, once you kill it, Spinnerette drops down from the cave’s ceiling.
- Stats: 250 HP, 10 ATK, 5 SPD, and 5 LCK.
- Spinnerette tends to spawn Spiderlings when she takes damage. These burrow into your character’s bodies, causing damage and inflicting the Infest debuff.
- She also enrages when hit from behind, granting her increased movement and attack.
- The cavern has webs on the floors, and the boss also tosses these around. Anyone who’s Webbed will have to use their basic attack just to free themselves. Taking damage from another source also causes them to be freed.
- As you deplete Spinnerette’s HP, she’ll jump up to the ceiling and spawn Spider Cats. These mobs need to be taken out to make her plop back on the ground.
Act 1: Boneyard – Dybbuk

Dybbuk might be one of the most annoying bosses in Mewgenics. That’s because this cat specter likes to dodge almost everything.
- Stats: 85 HP, 5 ATK, 3 SPD, and 5 LCK.
- Dybbuk will automatically dodge single-target attacks, weapon swings, and abilities–i.e. those that hit only a single tile. This battle will be a test of patience, or next to impossible if your party doesn’t have the right skills.
- That said, Dybbuk can take damage from the following:
- Area-of-effect (AOE) abilities if he doesn’t move too far away. Abilities that damage all units, or shared damage like Soul Link, also work.
- Damage-over-time (DOT) effects like Poison, Bleed, Burn, and Leech… but only if the initial hit or counter is successful.
- Linear abilities–i.e. those that travel in a straight line, such as the Thief’s basic attack–if he dodges forward or backward.
- Reactive effects like Knockback, Thorns, and even counterattacks and bouncing projectiles.
- Dybbuk’s main attack also absorbs mana.
- Dybbuk periodically summons Wisps that always dodge the first instance of damage. You need to hit them twice to destroy them.
You’ll have an issue with Dybbuk if most of your party’s abilities are single target. If this is the case, then it’s better to spend your early turns crowding around him until he’s completely surrounded. Minions/adds are good to have for this fight, too. If he has nowhere left to go, then he’ll attempt to dodge but end up on the same tile. He will, however, jump out of the way and reposition on the next round.
Last but not least, Dybbuk will possess the cat that made the final blow–i.e. the last hit that completely depleted his HP. This cat will restore their HP and mana, but they’ll turn hostile. You need to incapacitate them, which causes Dybbuk to get exorcised. He’ll have 1 HP remaining, though he’ll still try to dodge attacks.
Note: Because you need to defeat the cat that gets possessed, you need to be very careful. There are items that instantly kill the bearer or any unit that gets downed, as well as skill triggers, injuries, or disorders that cause debilitating effects.
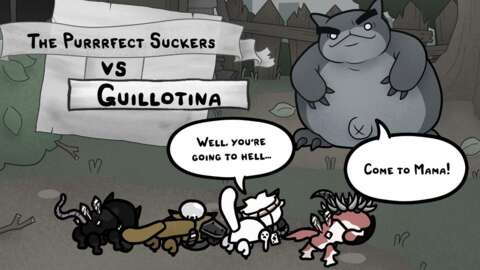
Act 1: House Boss – Guillotina

As mentioned earlier, house bosses in Mewgenics will start spawning as you progress through the campaign. You’re given ample time to prepare, so make sure you have “retired” cats at higher levels and with awesome skills. The three Guillotina encounters tend to have straightforward mechanics.
Guillotina: Part 1
- Stats: 400 HP, 5 ATK, 3 SPD, and 5 LCK.
- Guillotina mostly stomps around, beating up anyone in melee range. She can also toss them farther away.
- The main challenge here is her high HP. You better get used to it because house boss encounters take a while.
- It’s a good idea to whittle down her health with DOT effects like Bleed and Burn. Confusion also works wonders since she could damage herself instead.
- Reward: Throbbing Gristle quest item
Guillotina: Part 2
- Stats:
- Body: 250 HP, 8 ATK, 1 SPD, and 5 LCK.
- Head: 250 HP, 4 ATK, 5 SPD, and 5 LCK.
- You now have to contend with Guillotina’s disembodied head, since the body itself won’t pose an issue until later.
- Guillotina’s head is the more dangerous of the two targets since it likes to roll around and do wide linear attacks that cause Knockback.
- Upon destroying the head, the body will automatically restore +100 HP.
- Reward: Putrid Leech quest item
Guillotina: Part 3
- Stats:
- Body: 400 HP, 0 ATK, 2 SPD, and 5 LCK.
- Head: 200 HP, 5 ATK, 0 SPD, and 5 LCK.
- Here’s where things get fairly interesting. You’ll notice how the body has low SPD but zero ATK, while the head has 5 ATK and zero SPD. That’s because Guillotina’s body will attempt to get closer to pick up its head.
- Once the two are attached, Guillotina will perform Shriek, which inflicts Poison and Hex. Not only will the entire team lose health per turn, but they’ll have to spend more mana to cast spells.
- One viable strategy is to keep the head and body apart via Knockback effects or even the Psychic’s push-and-pull spells, assuming you’ve unlocked the class already.
- If you destroy the head, the body will start summoning a miniboss. We’re unable to confirm if you get a different creature each time but, in our playthrough, we got the Mama Maggot miniboss.
- Reward: Guillotina’s Head quest item
Act 1: Throbbing Domain secret zone – Throbbing King

All the strange objects you received from Guillotina are part of a progression quest that unlocks the Throbbing Domain. At the opposite end of the map, you’ll face the Throbbing King himself.
Throbbing King: Phase 1
- Stats: 460 HP, 5 ATK, 3 SPD, and 5 LCK.
- The Throbbing King lobs around a projectile that ensnares a unit. They have to take damage from any source or expend their basic attack to free themselves.
- The Throbbing King periodically vomits his innards. This can spawn harmless Poo or slightly more dangerous Clots. The Clots transform into larger variants after a turn.
- The most dangerous part of this Mewgenics boss fight is the Throbbing King’s Follow Orders mechanic. Every round, he’ll designate safe tiles in the room:
- It’s possible for the safe tiles to be the ones adjacent to him, the ones at the edge of the room, or completely random. You might even experience a situation where party members have to be at least two tiles apart just to be safe.
- At the end of the round, sickening tentacles will emerge from the hazardous tiles. These deal a tremendous amount of damage.
Throbbing King: Phase 2
- Stats: 150 HP, 3 ATK, 5 SPD, and 5 LCK.
- After depleting the Throbbing King’s health, he’ll leave his poop/tumor throne and begin the second phase of the bout.
- The Throbbing King’s main attack is a vomit blast fired in a straight line. It pierces through units and inflicts Bleed, too.
- He will jump away after each attack made against him. Having high SPD/movement, spreading your team around, or extra range is integral to ensure that you’re always dealing damage every round. If you can inflict status effects like Bleed or Stun, then that’s even better.
Mewgenics has over a dozen classes, along with hundreds of skills and items, to keep future runs refreshing. You’ve got your work cut out for you, especially with countless potential synergies and random permutations. If you need more help, you can always take a look at our Mewgenics guides hub.

This post offers some great insights into tackling the challenging bosses in Mewgenics. It’s always exciting to see strategies that can help players conquer tough obstacles. Looking forward to trying out these tips!
to have strategies laid out clearly! I found that focusing on leveling up your cats’ stats can really make a difference in those tough battles. It’s all about finding the right balance!
Absolutely! Leveling up your cats’ stats is crucial, but don’t forget about the importance of choosing the right abilities for each boss. Some bosses have specific weaknesses that can really turn the tide in your favor!
You’re right about the stats! Also, experimenting with different cat combinations can really make a difference in tackling those tough bosses. Each cat has unique abilities that can complement each other well.