
Are you thinking of how to complete all quests in Mewgenics? These activities are divided into two categories: There are quests that reward items for your loadout, and there are quests that lead to new areas. We’ve got all the details for you in our guide, but please be reminded that there will be major spoilers ahead.
Note: At the moment, we’re only going to talk about activities related to the game’s first chapter/act. Then, in the coming days, we’ll add more tidbits about the ones you can tackle in Act 2, Act 3, and beyond. Oh, and if you’re curious just like a cat, you can head over to our Mewgenics guides hub for more tips and tactics.
The differences between Invention Quests and Progression Quests

Both Invention Quests and Progression Quests concern special items that can be equipped by a cat. You then have to bring these items to a particular location, usually to the very end of an act–i.e. one full run. However, these strange objects also have modifiers that make your runs more difficult. There are also some differences between the two types of quests.
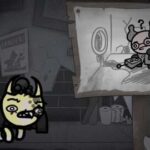
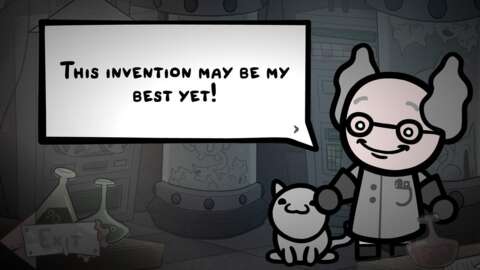
Invention Quests
- Invention side quests in Mewgenics become available whenever you send five cats to Dr. Beanies. These cats must have mutations, birth defects, disorders, or parasites.
- You can hold up to five invention quest items in your storage. These are stored separately from your regular gear, so don’t worry about cluttering up your inventory space.
- If you’ve reached the limit of stored invention quest items, Dr. Beanies won’t accept further cat donations until you complete the task. Alternatively, you can put the quest item in the trash slots at the end of the day. This abruptly causes that quest to fail.
- If a quest fails–i.e. you discarded the item or the cat holding it perished–you have to donate to Dr. Beanies once more. He might just give you the same quest from his selection pool.
- The modifiers of each item tend to be fixed, but the destinations that you need to clear are randomized.
- If you succeed, Dr. Beanies rewards you with 200 coins. The quest item then turns into a regular item without the hassle of modifiers.
Progression Quests
- Progression side quests involve special items that are dropped by house bosses, such as Guillotina.
- You undertake these activities gradually and in succession. Each house boss encounter that you complete yields a different object.
- Since there are three Guillotina encounters, you also need to complete three quests related to the boss. Of course, this also applies to the other house bosses that you face later in the campaign.
- You can have several progression-related quest objects. These won’t interfere with the storage spaces of regular gear and inventions.
- The destination that you need to clear is always fixed.
- If you fail, you can talk to Dr. Beanies to receive the same quest item.
It’s possible to bring a combination of quest items, though doing so causes the challenge to ramp up considerably due to modifiers. Try to avoid effects that are hard to manage or those that can lead to disastrous results. For instance, you probably shouldn’t bring an item that instantly incapacitates other team members and another that causes downed units to explode. You’ll be all by your lonesome and you won’t be able to revive anyone.
In any case, you’ve got your work cut out for you if you want to tackle the side quests in Mewgenics, so feel free to take a look at our best skills guide and best items/weapons guide.
Mewgenics – All Invention Quests from Dr. Beanies

Here are all the invention-type quests and rewards that we’ve discovered so far. We’ve opted not to include the required destination since this tends to be randomized.
Bubble Boy
- Modifier: All units rebound with Knockback 5 on contact.
- Reward: Bubbles – Throw a bubble with Wind and Water element that inflicts Confusion.
Angry Face
- Modifier: The cat that equips this item turns into an enemy and must be downed to win the battle. It still receives level up. This item is cursed and cannot be unequipped. It also cannot be worn by a Collarless cat.
- Reward: Happy Face – Spawn near enemies and take an AI-controlled bonus turn at the start of each battle.
Experimental Treatment
- Modifier: Your team’s passive ability level ups offer disorders instead.
- Reward: Disorder Decoder – Your spells cost -1 less mana for each disorder you have.
The Loner
- Modifier: Kill all of your allies at the start of each battle.
- Reward: The Loner Mark 2 – Deals 5 damage to anything in your line of sight. Reload: Any ally dies.
Chaos Device
- Modifier: When any cat levels up, they are offered abilities from all classes.
- Reward: Chaos Controller – Abilities from all classes are offered when you level up. You can reroll level up options thrice.
Redacted
- Modifier: Health bars and status icons are hidden in battle.
- Reward: Paper Bag – Your CHA is equal to your highest stat.
Storage Locker
- Modifier: Your team’s active ability level ups offer rare items instead.
- Reward: Armory Key – Find an extra item after each battle.
Me Stone
- Modifier: This cat always levels up and can level up even if it was downed. (Other cats in the party do not level up.)
- Reward: Suck Stone – At the end of your turn, drain up to 5 mana from each of your allies.
Magic Mirror (Broken)
- Modifier: Your team has very bad luck during events. You gain +2 Thorns. This item is cursed and cannot be unequipped.
- Reward: Magic Mirror (Fixed) – You have a +20% chance to reflect projectiles. Spawn a friendly Spookie when downed.
Unidentified Pills
- Modifier: Gain +8 Shield. The entire adventure becomes harder–i.e. tougher bosses and enemies with stronger buffs.
- Reward: Truck Stop Pills – You gain +3 Brace. You count as a rock.
Ultravision 3000
- Modifier: Events are harder. All normal events trigger two extra events.
- Reward: Ultravision 3000 v1.1 – You gain +4 LCK. Your basic attack inflicts Marked–i.e. guaranteed hit and critical. This item is cursed an cannot be unequipped.
Glass Cannon
- Modifier: Fill the map with glass at the start of each battle.
- Reward: Shoots a glass ball anywhere.
Mysterious Dice
- Modifier: Your team’s level up options are complete chaos.
- Reward: The D6 – Permanently upgrade one of your abilities at random; one use.
Party Detonator
- Modifier: All units explode when they die. This item can be used once per battle to explode a random unit.
- Reward: Party Detonator (Fixed) – Explode a random unit within a target radius; once per battle.
Nuclear Knife
- Modifier: A melee attack whose damage is equal to the number of charges. It permanently gains +1 charge at the end of each turn. If charges go above 10, this weapon explodes. It loses half of its charges when you kill something with it.
- Reward: Nuclear Gun – Deals 40 damage to a target and 20 damage to everything else. This item has a 20% chance to break when used.
Spider Injector
- Modifier: Apply Infested 4 to all allies at the start of each battle.
- Reward: Spider Baby – Apply Infested 1 to all enemies at the start of each battle.
Princess Hat
- Modifier: You gain +10 Shield. You cannot use any action except Move. This item is fragile and will break if you’re downed.
- Reward: Used Princess Hat – Grants +6 Shield.
Stopwatch
- Modifier: You have five seconds to make decisions in battle. Otherwise, cats will act randomly.
- Reward: Stopwatch (Fixed) – You or a target unit takes an AI-controlled bonus turn.
Persuasion Device
- Modifier: Lose -2 SPD. Use to permanently Charm a non-boss enemy. It joins your party.
- Reward: N/A
Fart Face
- Modifier: Apply Poison 1 to everything at the start of each battle.
- Reward: N/A
Air Horn
- Modifier: You are ambushed every battle. Use it to make some noise.
- Reward: N/A
Progression Quests: Act 1 – Guillotina’s remains

From this point onward, we’re going to talk about the Progression Quests in Mewgenics. As mentioned earlier, these are all related to the strange objects dropped by house bosses. Again, just to be 100% clear, there will be major spoilers moving forward.
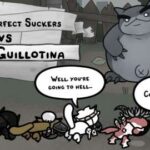
The first house boss that you face is Guillotina and there are a total of three encounters. Here’s what you receive upon completing a couple of them.
Throbbing Gristle
- Destination: Take it to the Wall of Flesh in the Caves.
- Modifier: All units die when they get downed. This item can be used to do a melee attack that turns anything it kills into meat.
Putrid Leech
- Destination: Take it to the Throbbing Artery in the Boneyard.
- Modifier: You never level up and you die when you’re downed. You have lifesteal on all your attacks and abilities. This item is a parasite and is cursed.
Survival is imperative if you want to succeed with these items in tow. That’s because there’s no longer a “corpse health” mechanic when character’s are incapacitated. They just instantly die. For the Throbbing Gristle, this affects everyone, including enemies. For the Putrid Leech, this affects only the bearer of the item. Since this particular character won’t level up as well, then you need to breed a character that has decent starting skills, just so they could contribute to the team.
In any case, you need to bring these items to their respective locations–i.e. the event spots after eliminating the main bosses in the Caves and Boneyard. A new option should appear, allowing you to use these items.
Progression Quests: Act 1 – The Throbbing Domain

Once you’ve done the above steps in separate runs, you’ll gain access to the Throbbing Domain in Mewgenics. This is pretty much the game’s first secret zone. You can enter it via a node just past the main boss in either the Caves or Boneyard.
The Meat Altar
When you initially enter the Throbbing Domain, you’ll notice an altar made of flesh and veins blocking your path. There’s an option to sacrifice a cat chosen at random. We’ve noticed that LCK is the stat being checked, but we still failed and the cat perished. You could, instead, ignore the altar for now so you can go home.
Eventually, you’ll battle Guillotina for the third and final time. She’ll drop the last item that you need for this particular Mewgenics quest.
Guillotina’s Head
- Destination: Take it to the Meat Altar in the Throbbing Domain.
- Modifier: All battles are hard battles. Enemies will attack you instead of your allies, if they can. Units that contact or attack you have a chance to be Feared. Your basic attack also has a +10% chance to inflict Fear. This item is cursed.
This is going to be a grueling run due to all the challenging battles throughout. There’s also something you should know upon returning to the secret zone. Whoever has Guillotina’s Head equipped must be sacrificed to open the path to the rest of the Throbbing Domain.
Choose wisely, especially if you want to unlock class bonuses at this stage. You’re also down a teammate, so victory isn’t guaranteed. However, in succeeding runs, you can skip the Meat Altar event entirely. It’s also possible to revisit the location and, if you sacrifice a cat, everyone else gains buffs and has their HP restored.
That about does it for our guide on how to complete all quests in Mewgenics. As mentioned earlier, we’re going to add more details related to late-game acts in the coming days. For now, we encourage you to check our boss guide since you’ll be facing the Throbbing King soon enough.
Mewgenics has over a dozen classes, along with hundreds of skills and items, to keep future runs refreshing. You’ve got your work cut out for you, especially with countless potential synergies and random permutations. If you need more help, you can always take a look at our Mewgenics guides hub.